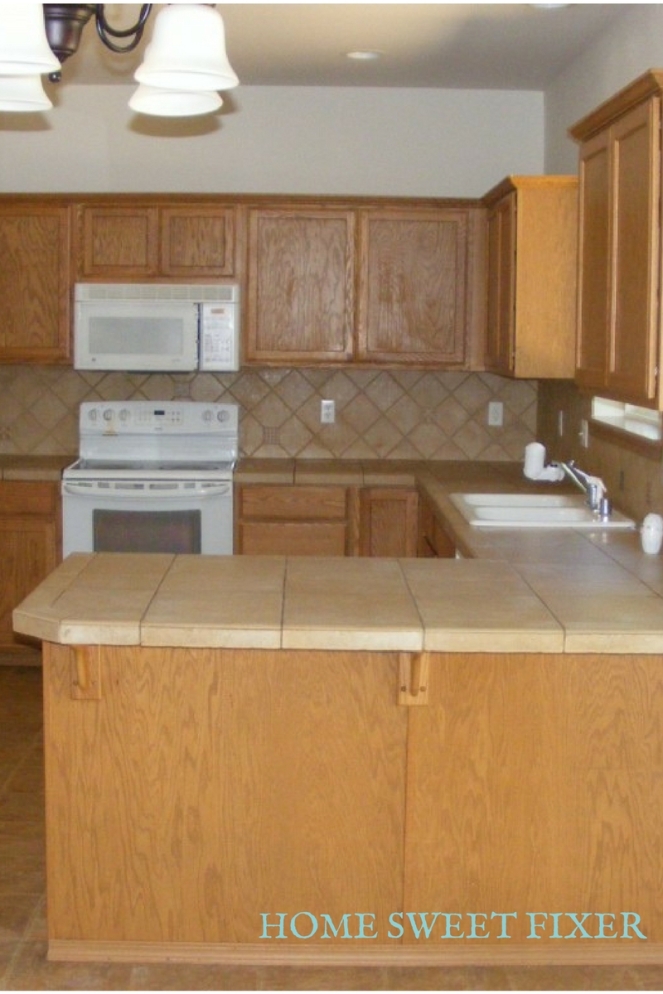
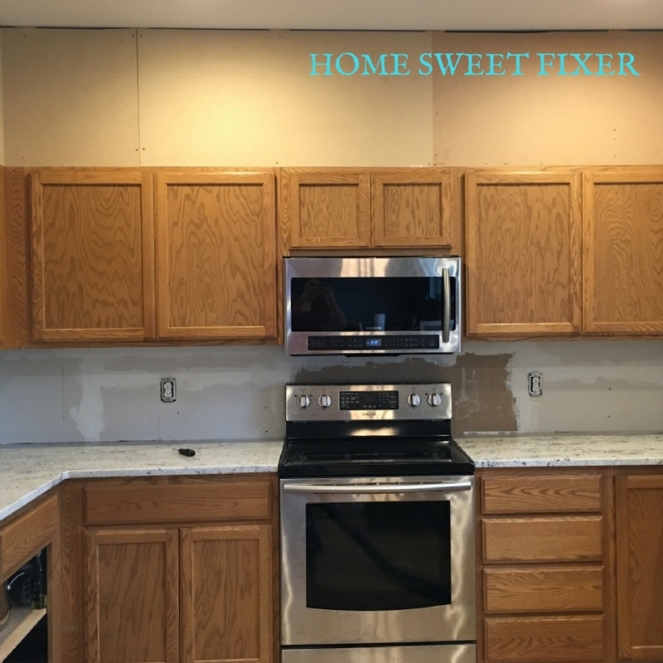
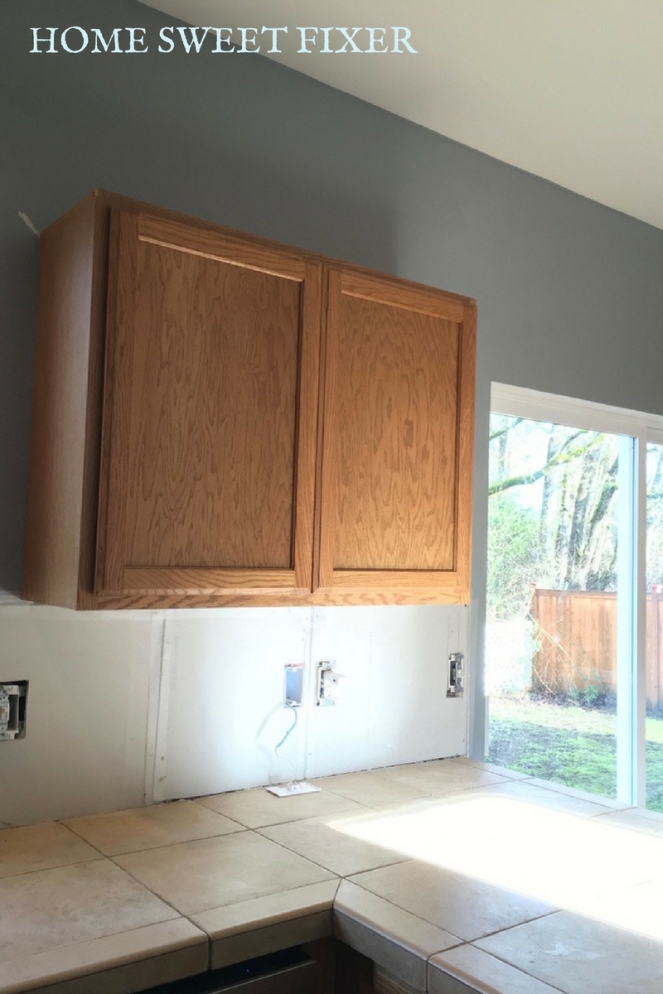
Hi there! If you have been following along with our Washington house kitchen makeover, you remember this is what we started with when we moved into this foreclosure about a year and a half ago. Everything was builder grade, dirty and kind of cheap looking. (Notice the missing microwave handle.)
 As we waited in Utah for the deal to go through before moving here to Washington, I shared my vision for this room in my post “I’m Dreaming of a White Kitchen”. At the time I wanted to add height to the upper cabinets to close in the gap between them and the ceiling, but I thought it might be too hard to actually do. I had a hard time finding tutorials online and we didn’t want to spend a lot of money buying custom cabinets to add to the top of the existing uppers. BUT, I was determined to try and Kyle is so sweet, he jumped on board with me (for some crazy reason).
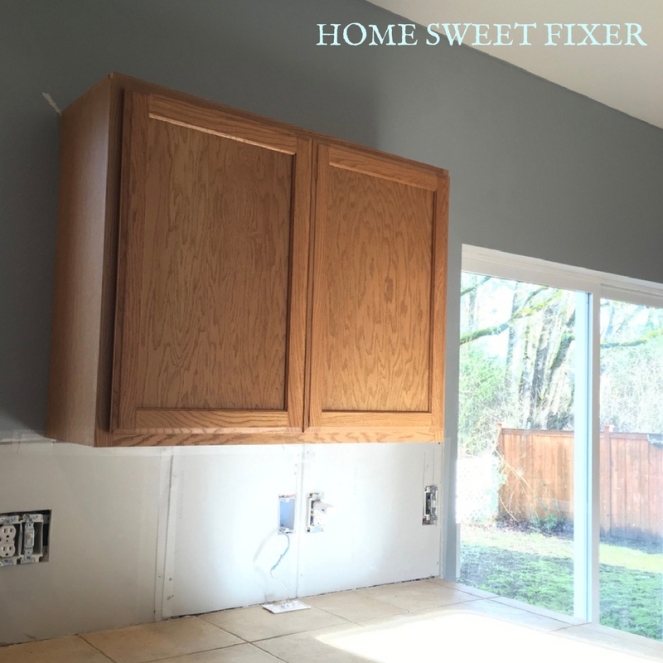
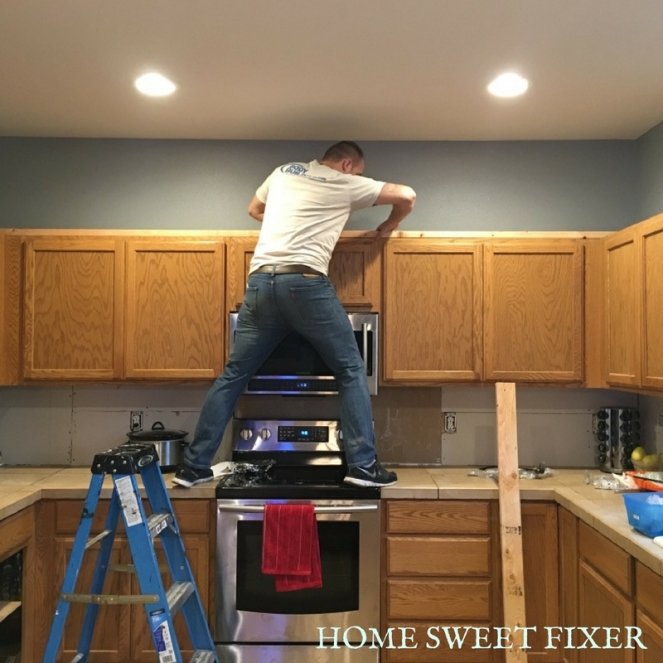
Here is an up close view of one of the upper cabinets after we took off the decorative crown molding. We saved all the molding for later.
Here is the basic idea we came up with for extending the “cabinets” to the ceiling.
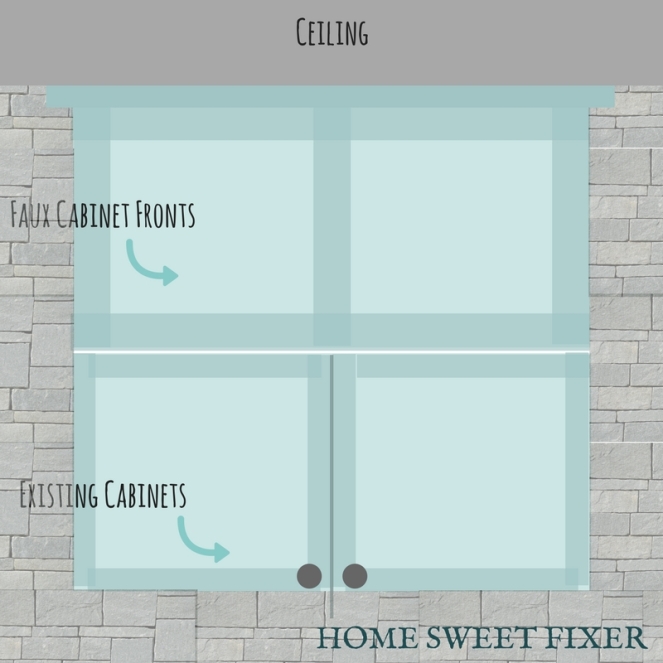
The tricky part…how to anchor the new faux cabinets? We needed a plan:
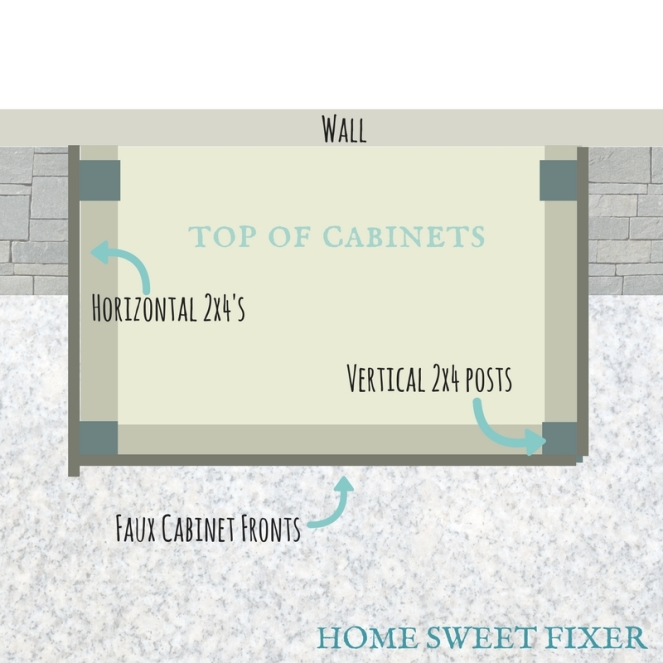
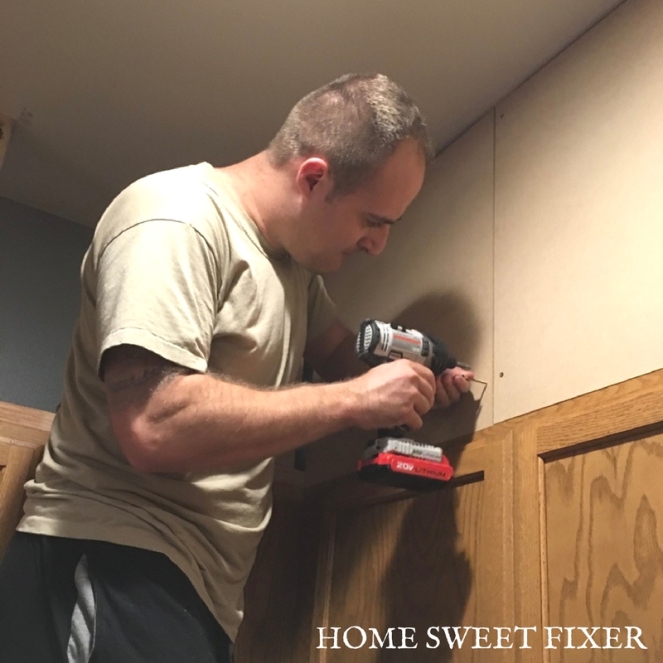
We decided to attach 2×4’s along the top of all the cabinets, leaving a 1/4″ inch gap at the edges for the wood paneling. This part was a little tough. While Luke slept, Kyle and I climbed around on the counters. I was in charge of holding the ruler and checking our quarter inch gap as Kyle screwed the boards horizontally onto the cabinets. This took some time, but we wanted the measurements right so our cabinet fronts wouldn’t stick out over the cabinets below.
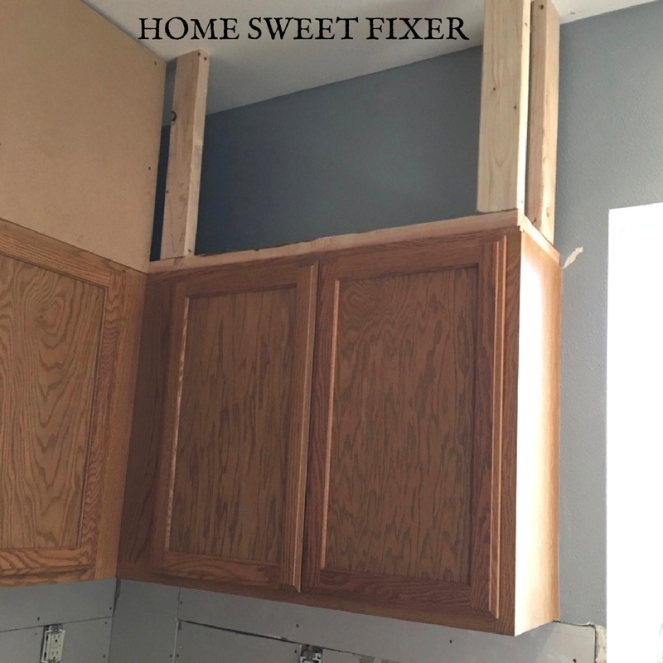
From there we added the vertical posts. We just measured the space from the tops of the horizontal 2x4s to the ceiling and cut more 2×4’s to size. We got out our little level (did you know the Dollar Store sells levels??) and made sure the posts were standing straight up and down in both directions. Then it was time for screws. Since the FAUX cabinets are FAUX and purely for decoration, we just drilled diagonally into the 2x4s to connect them to the cabinet tops and ceiling.
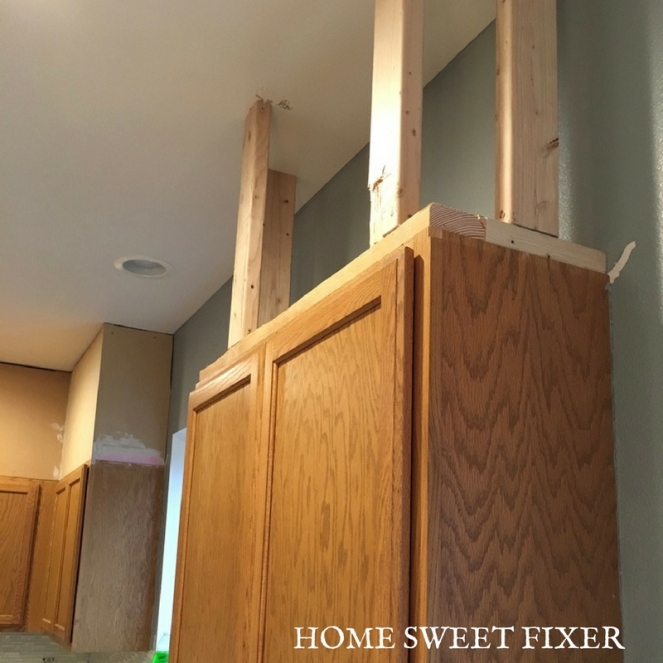
This is probably not how you want to build a jungle gym, but it is definitely strong enough to hold up some plywood panels.
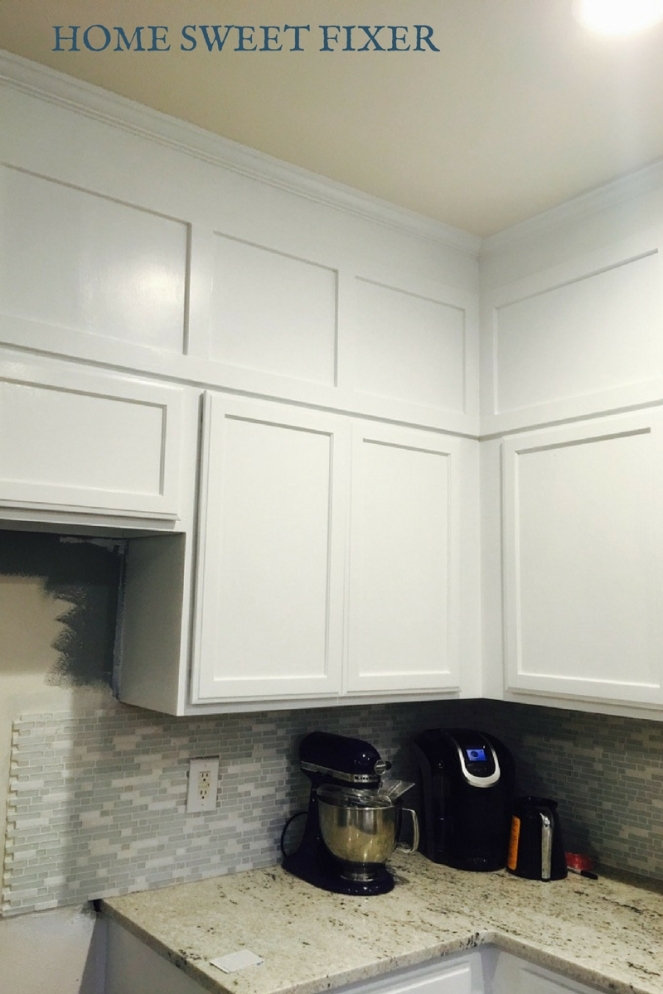
After that, it was time to start hanging the plywood! This part was exciting! The hole above the cabinets was going to be hidden forever! (Did I mention that there were some pretty gross dead bugs and impressive dust bunnies up there we had to clean up first?) We just bought cheap 1/4″ plywood and had to cut it to the right width as we went. We still don’t have a table saw (our garage is too tiny for any more big toys/tools) so we used our jigsaw with the little laser to cut through each board. Then we screwed the pieces to the 2×4 supports, making sure all the pieces were flush with one another (or as close as possible).
Our cuts weren’t 100% straight (again table saw = much better cuts) but we just put the cut edge along the ceiling where the trim would cover any imperfections.
The next step was kind of genius…just sayin. We took the old crown molding that was originally on the top of all the upper cabinets and reattached them to our new cabinet fronts. Because they were already cut to the prefect size, nailing them up was a breeze.
To make everything look seamless and fool everyone into thinking the new “cabinets” were always there, I had to shimmy back onto the counters (I was starting to feel like it was normal to walk around at ceiling height) and put my artist cap on.
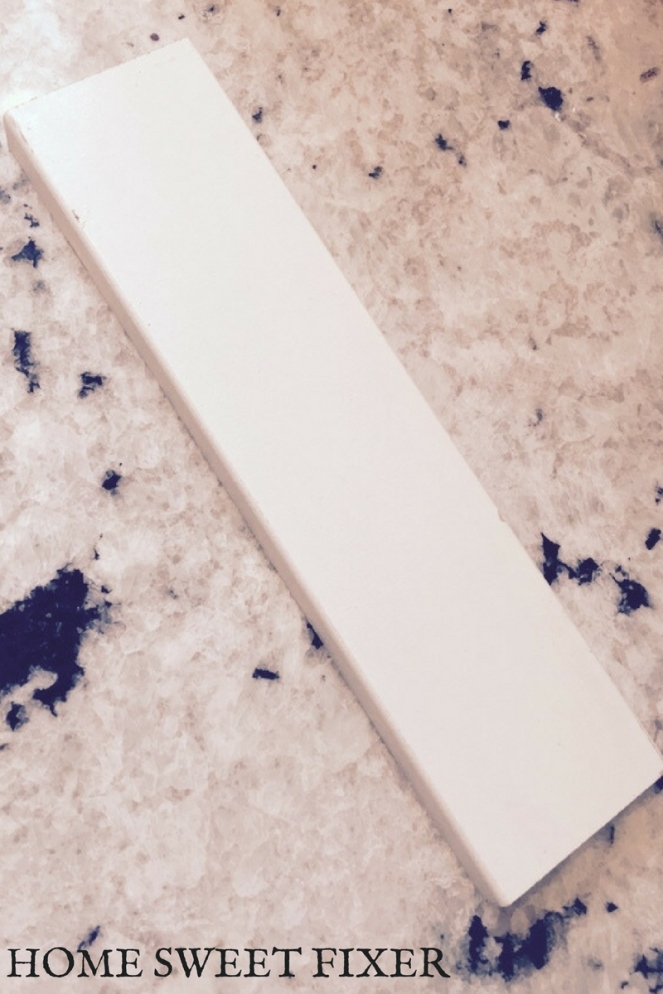
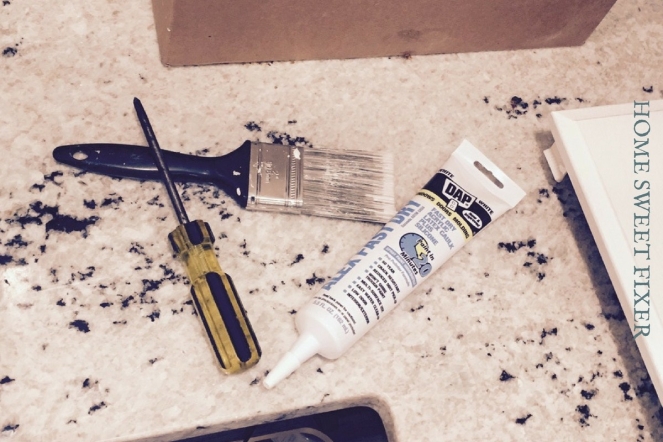
Here’s what I used to fill all the gaps between the panels:
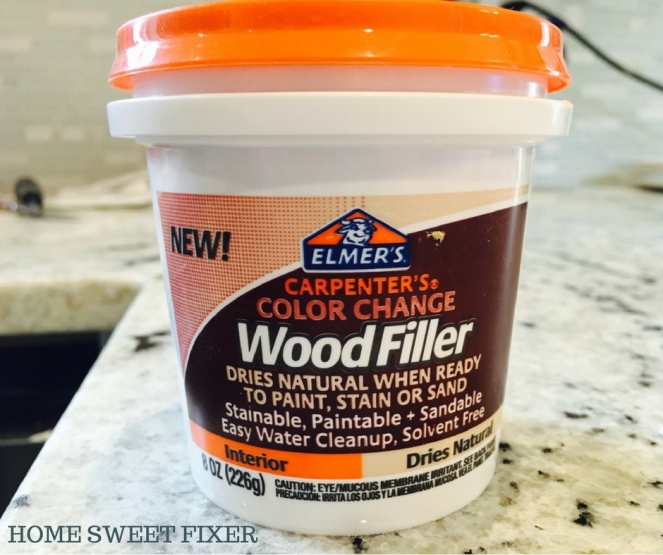
Using a plastic putty knife, I scooped, swooshed, and feathered my way across all the gaps. I had to do several coats at the corners near the sink to build nice smooth edges, but in the end, I felt proud of my work (of art).
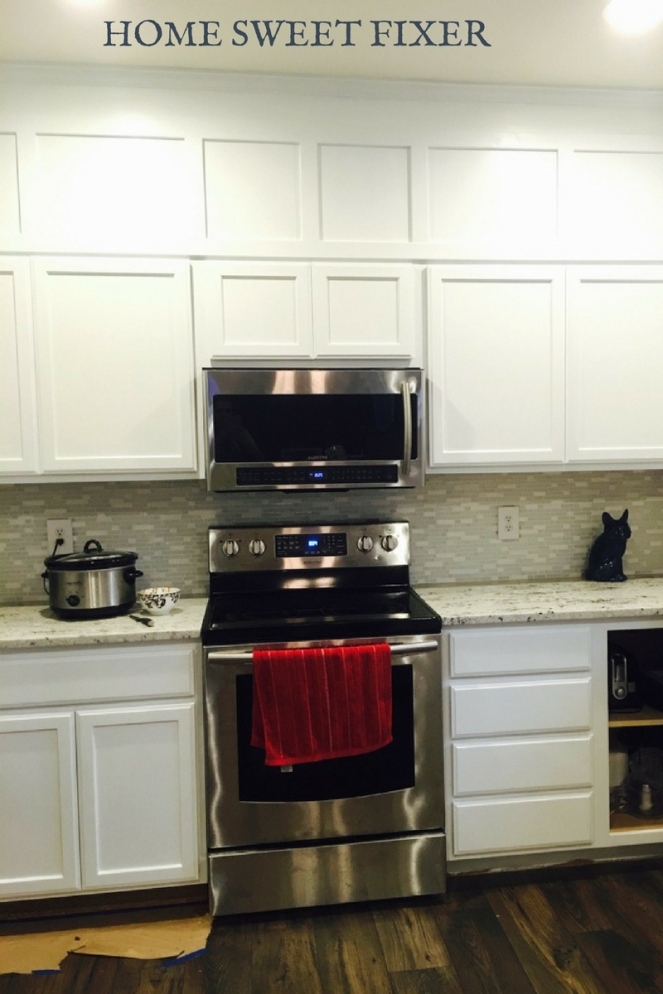
While all the wood putty dried, Kyle and I started work on the trim to match the cabinet doors. We used this flat trim we found in the baseboard section of Home Depot. We used the long pieces to run horizontally across the gap between the old and new cabinets, making sure the cabinet doors could still open. Kyle nailed the trim up and I held up the other end, checking to make sure we were level the whole way. Next we cut all the vertical pieces at 14″. Why 14″? We did some eyeballing, and just thought the trim looked good at that height.
Once everything was cut, we put the vertical pieces at all the corners and then added them above all the places where the real cabinet doors started and ended. Like this:
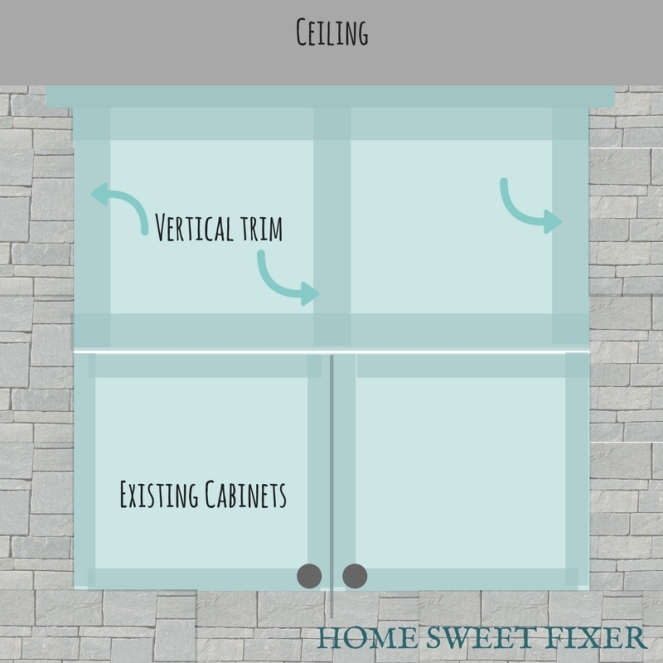
Once all of those were leveled vertically and attached, we attached the last of the horizontal trim right across the top. Easy! I caulked all the seams while Luke napped and Kyle was at work.
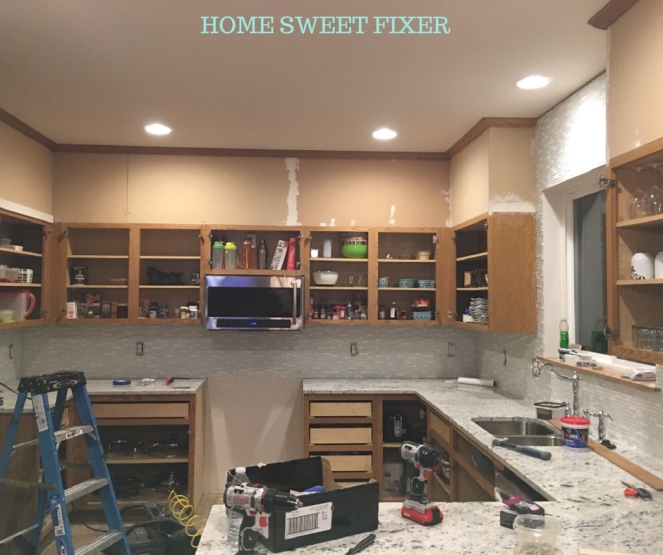
At this point we had invested a lot of time into the cabinets, but there was still more to do. I’m talking PAINT!
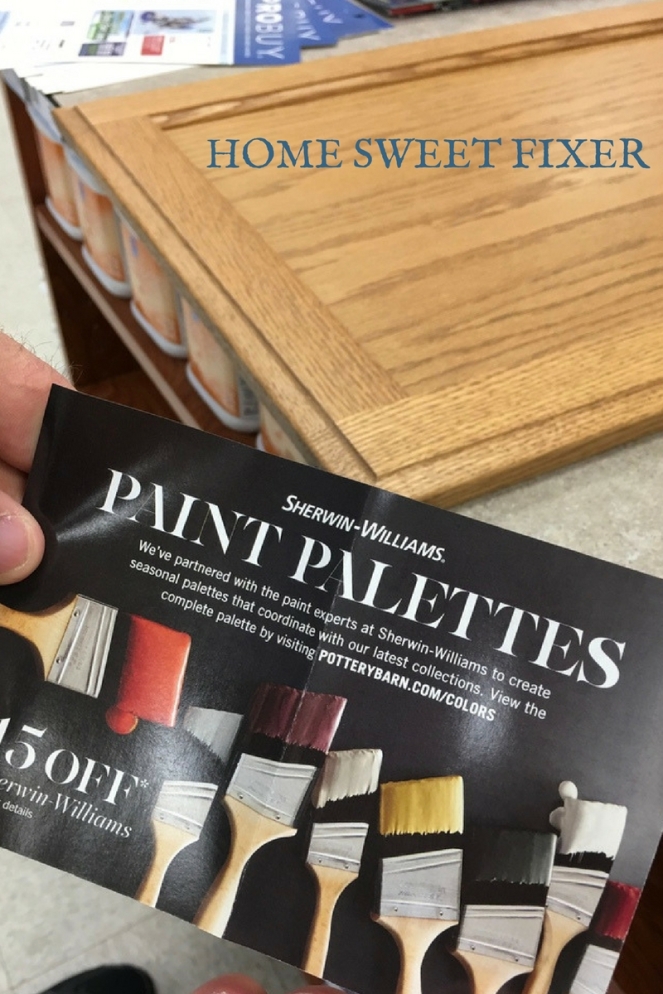
I wanted to make sure our white paint would stick to the old oak cabinets (we painted cabinets once before and we had constant peeling) so we went to Sherwin Williams to see what we could do. We ended up with this and their primer. Pricey!
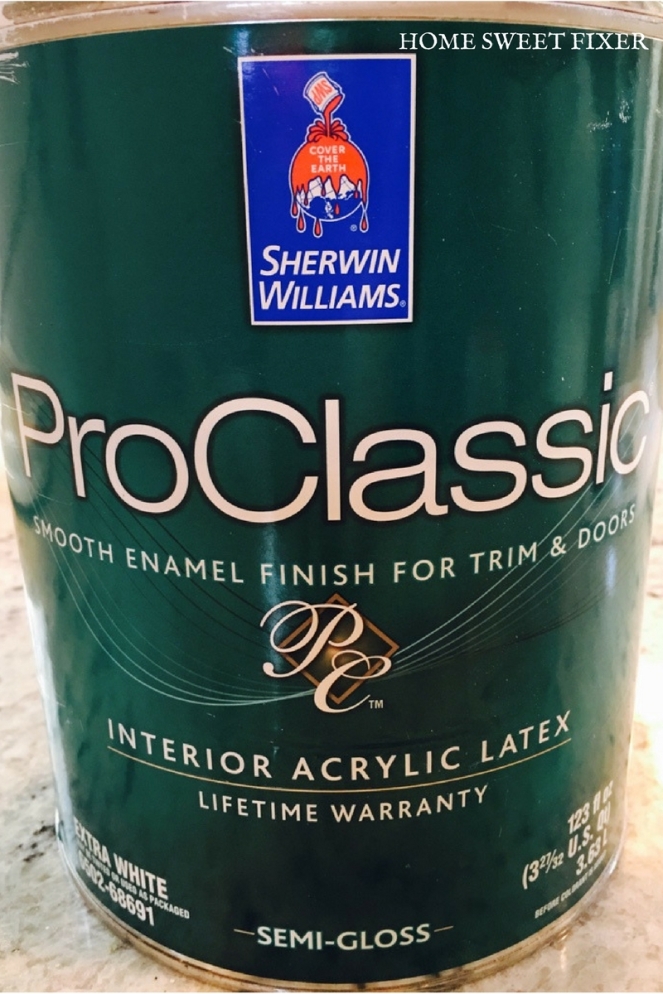
We had a coupon at least!
Then the WEEKZZZ (all time and eternity) long process of priming and painting began:
 It took forever! At first it was fun to see the uggle brown cabinets turn white….
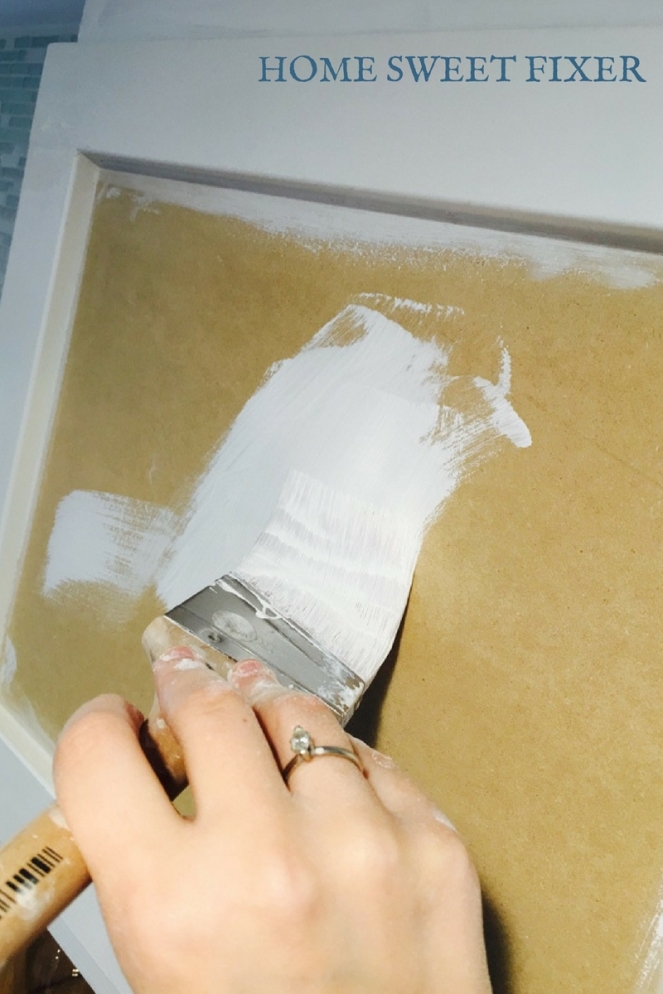
Then the 2nd and 3rd coat hit…
And we had to paint every single door and drawer front multiple times….
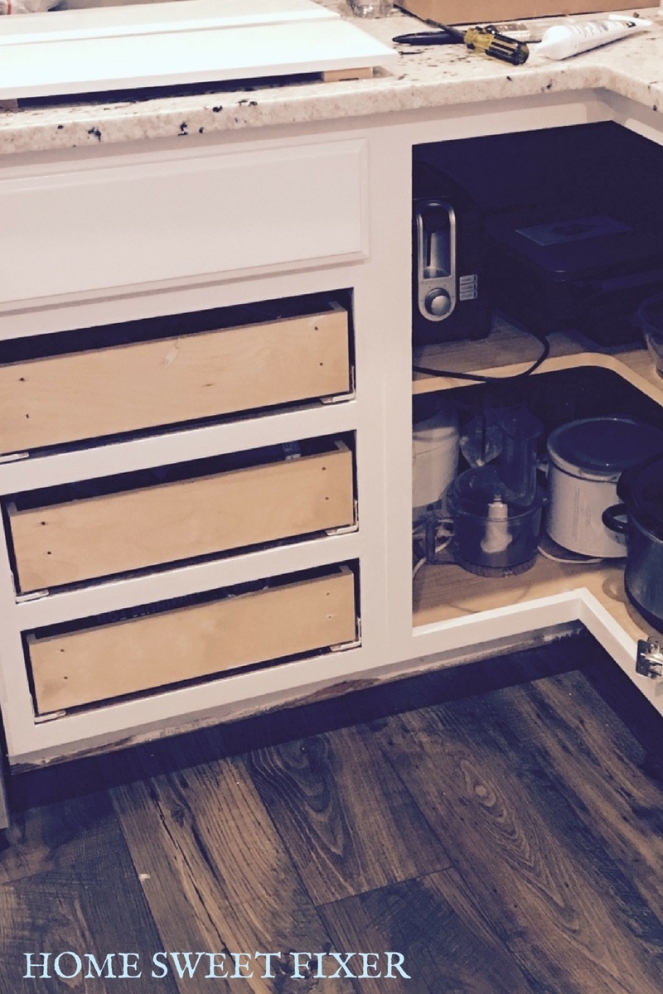
And the fun definitely wore off, but we needed our kitchen back! And our dining room….and our garage. We had cabinet doors everywhere! Finally the painting was done and we could do a happy dance!!!
…And cook dinner in our own kitchen again!
So we went from this:
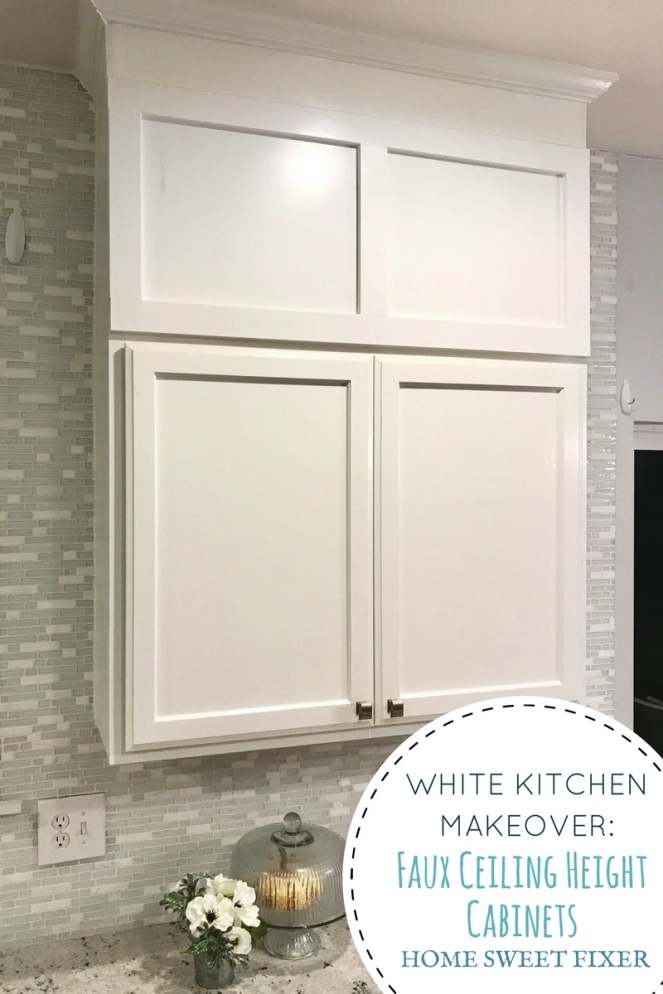
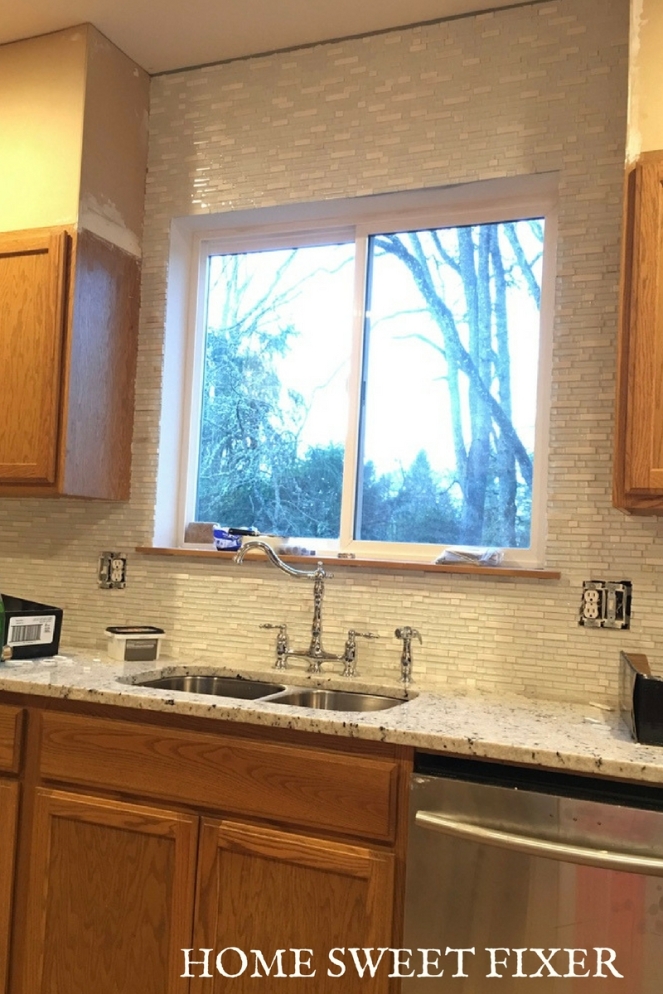
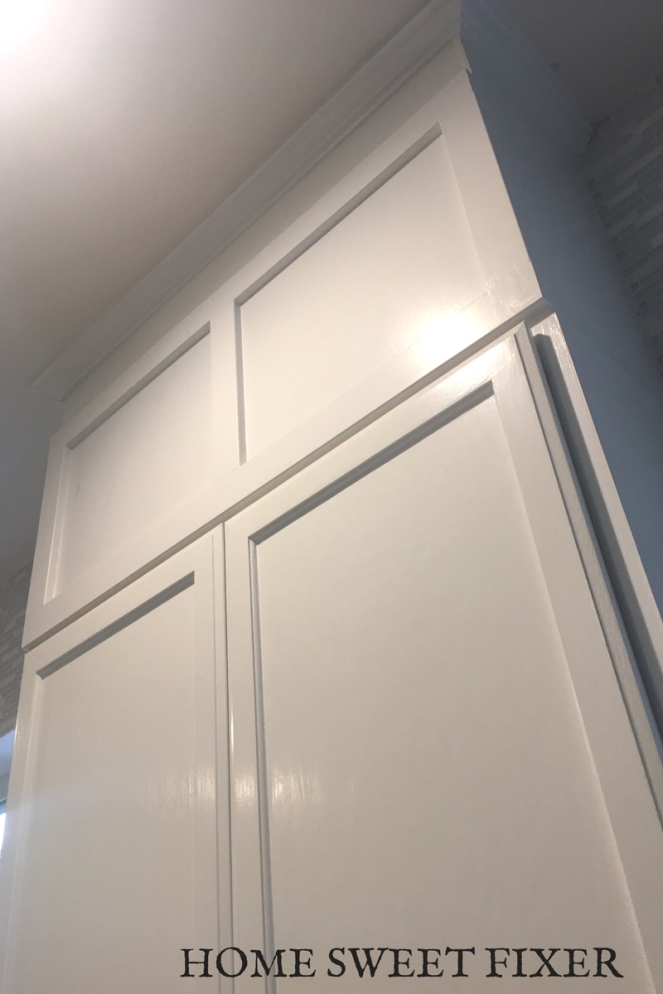
To this:
I know this has been a long post, but it was our longest project here at our 3rd Home Sweet Fixer. (Almost as long as the DIY custom closet we built in our last master bedroom in Utah!) We are SO HAPPY TO BE DONE! We love how the kitchen looks and now it feels so much bigger and cleaner! What do you think?
BUT WAIT, THERE’S MORE!
Want to see what the kitchen looks like now that we added knobs and pulls to all the doors and drawers? Click, here. Plus, check out the fancy new white corbels we added underneath the bar seating area while you’re there! There is also a link to before and after photos of our finished kitchen there.
Thanks for following along with all our crazy remodel projects. We hope we have inspired you to tackle some projects, or finish those tough ones you’ve already started. We would love to hear what you’re up to, so feel free to comment below!

SaveSave
